HOME STUDIO
Stop Blaming Your Mic: Real-World Acoustic Treatment for Pennies
Bob Williams shares 40 years of wisdom on how to turn a spare bedroom into a pro-sounding space without breaking the bank using simple physics and DIY materials.
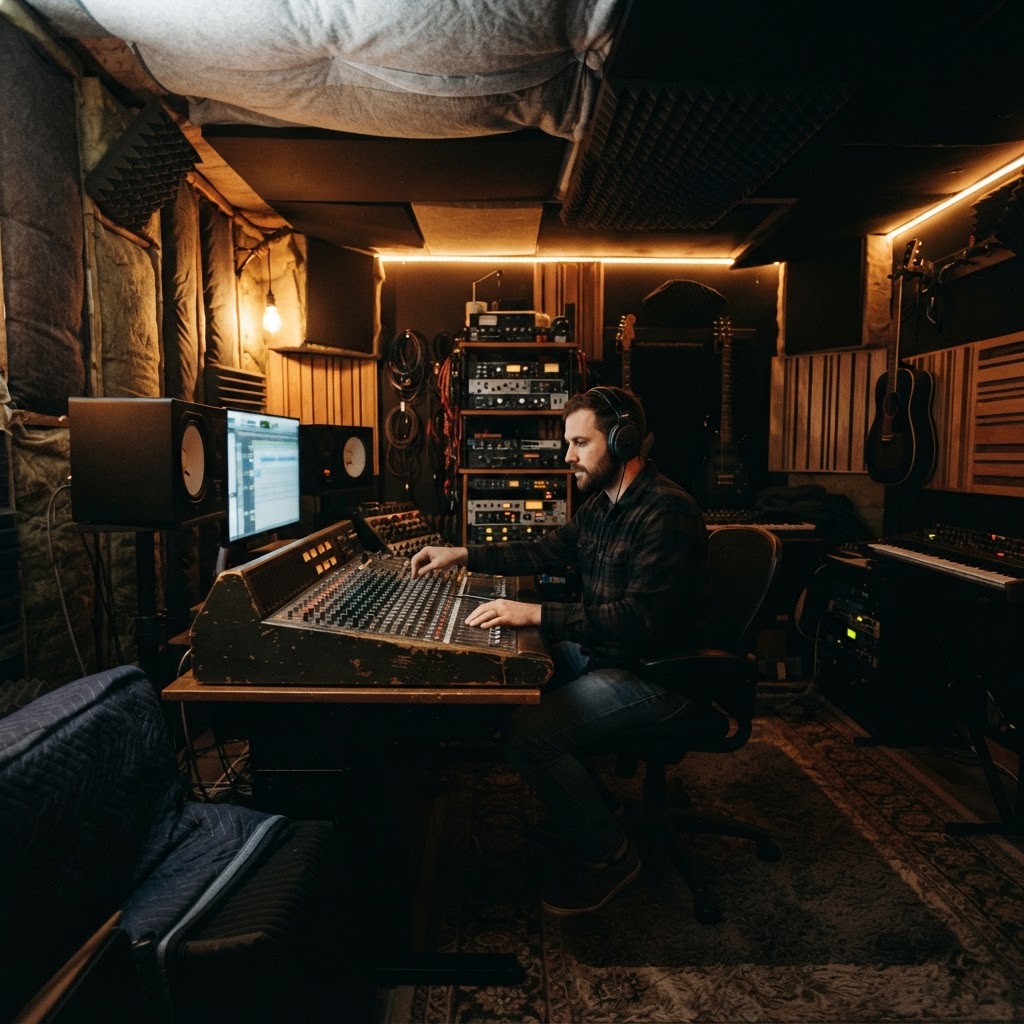
Hey there. I'm Bob Williams. I’ve spent the better part of four decades behind mixing consoles and holding guitars, from smoky bars to high-end studios right here in Scottsdale. Over the years, I’ve seen a lot of changes in technology, but one thing remains constant: the laws of physics don't care how much you paid for your microphone. If you're recording in a room that sounds like a gymnasium, your tracks are going to sound like they were made in a gymnasium. I see so many young players coming through my 'Sound Check with Bob' course who think the answer to a bad recording is a more expensive preamp. It’s not. The most important piece of gear in your signal chain is the air between the sound source and the mic. You don’t need a $10,000 renovation to fix that air; you just need to be smart about how you treat your space. \n\nMastering the Basics Without the Bill \n\nBefore you reach for your wallet, let's look at what you already have. Most home studios are carved out of spare bedrooms or offices—rectangles with hard, parallel walls. Sound waves love to bounce back and forth between those walls, creating what we call 'flutter echo' and 'standing waves.' That metallic 'zing' you hear when you clap your hands in an empty room? That’s your enemy. Your first move is to break up those flat surfaces. If you’ve got a thick rug, get it on the floor. If you have heavy moving blankets or even thick winter coats, hang them up. One of the best budget tools in the history of recording is a full bookshelf. Because books have different heights and depths, they act as a natural diffuser, scattering the sound waves instead of reflecting them straight back. It’s not a perfect laboratory solution, but in a home setup, a wall of books can be a lifesaver. Another trick I’ve used for years is the mirror trick. Sit at your mixing desk and have a friend slide a mirror along the side walls at eye level. Everywhere you see your studio monitor reflected in that mirror is a 'first reflection point.' That is exactly where you need to put some absorption. \n\nBuilding Your Own Broadband Absorbers \n\nNow, let's talk about the biggest mistake I see beginners make: buying that thin, convoluted egg-crate foam. Look, I’m going to be blunt—that stuff is mostly useless. It’s too thin to stop low-end frequencies, so all it does is suck the high end out of your room, leaving you with a muddy, 'boxy' sound that is impossible to fix in the mix. If you want a pro sound on a budget, you need mass. Go down to the local hardware store and look for mineral wool insulation, specifically something like Rockwool Safe'n'Sound. For about $60, you can get a pack that will make six large panels. Build some simple 1x4 pine frames, pop the insulation in, and wrap them in a breathable fabric—if you can blow through the fabric, it’ll work. These are 'broadband' absorbers. They handle everything from the high-mids down to the low-end. Take four of these panels and 'straddle' them across the corners of your room. Corners are where bass frequencies go to build up and cause trouble. By putting mass in the corners, you’re creating 'bass traps' that will make your low end tight and punchy. \n\nThe Secret Sauce: Diffusion and Clouds \n\nOnce the walls and corners are handled, don't forget the space above your head. The ceiling is often the largest untreated surface in a room, and it’s reflecting sound directly into your microphone and your ears. We call a panel hanging from the ceiling a 'cloud.' Taking one of those DIY Rockwool panels and suspending it a few inches off the ceiling directly over your mixing position will change your life. It clears up the stereo image and makes it much easier to hear where things actually sit in your mix. Finally, remember that you don't want a 'dead' room. If you cover every square inch in insulation, the room will feel suffocating and your recordings will sound unnatural. You want a balance. Use absorption to kill the harsh reflections at your ears, but leave some hard, irregular surfaces—like those bookshelves or even some wooden slats—to keep a bit of life in the air. Treat your room like an instrument; it needs to be tuned, not silenced. \n\nSound is a physical force, not a magic trick; treat your room with respect and it will reward your ears.
EAR-TRAINING FIELD TRIP

Nashville, TN, USA
Ryman Auditorium
YOUR EXERCISE HERE
Find a seat in the center of the original wooden pews and close your eyes while the stage is being set. Listen to how the natural curve of the room and the hard plaster walls carry the sound of a roadie's footsteps or a quiet conversation directly to your ears without any electronic help.
Free Listening Worksheet
5 questions on sound & music (2 fill-in-the-blank). Take it to the venue.
You Just Read the Free Version.
The full Sound Check course turns this into a system — 8 modules, 6 hours, a room that finally sounds right.
ENROLL NOW — $97